
Nidus was one of the later Warframes introduced into the game and instead of being tied with other varieties of Warframes or enemies, Nidus comes as the first infested-themed Warframe. Players make use of his infested structure, controlling fungal growth, larva and even spreading out his own Ravenous infestation.
As an infested Warframe, he does appear to have some traits of other infested creatures such as the lack of shields and a more health dependent type of defense. Nidus is one of the few Warframes that does not have any shields but reaches a high amount of health and has the ability to sustain it.
In order to obtain Nidus, players must first finish the Glast Gambit mission and afterwards farm for their parts in the Infested Salvage mission.
How to Get Nidus?
The Glast Gambit mission becomes available as players progress through the game which also unlocks The Index. The quest involves the player aiding a colony that is having issues with Nef Any. Once players complete this quest, the Nidus Blueprint is given as a reward.
Nidus parts must be farmed in Oestrus on Eris, an Infested Salvage mission that requires you to keep points safe by collecting serum and activating the vaporizers to allow manifests to be unlocked. Every rotation C has the chance to reward the following of Nidus’ components:
- Nidus Neuroptics
- Nidus Chassis
- Nidus Systems
Nidus may also be purchased in the market for 225 Platinum.
Crafting Nidus
The following are the crafting requirements for Nidus.
Nidus Blueprint
- NidusNeuroptics x 1
- Nidus Chassis x 1
- Nidus Systems x 1
- Kuva x 2,000
- Credits x 25,000
Nidus Neuroptics
- Mutagen Samples x 10
- Plastids X 1,000
- Polymer Bundle x 2,600
- Neural Sensors x 3
- Credits x 15,000
Nidus Chassis
- Polymer Bundle x 6,000
- Plastids x 1,400
- Nano Spores x 5,000
- Neurodes x 3
- Credits x 15,000
Nidus Systems
- Plastids x 6,000
- Circuits x 3,500
- Morphics x 14
- Orokin Cell x 6
- Credits x 15,000
Nidus Resources
The following is a list of resources needed to build Nidus, their locations as well as our guides on where to farm them.
Resources | Resource Locations | Guides |
Mutagen Samples | Eris, Deimos | Read Here |
| Plastids | Saturn, Uranus, Phobos, Pluto, Eris | |
Polymer Bundle | Mercury, Venus, Uranus | Read Here |
| Neural Sensors | Jupiter, Kuva Fortress | |
Nano Spores | Deimos, Saturn, Neptune, Eris | Read Here |
| Circuits | Venus, Ceres | |
Morphics | Mercury, Mars, Europa, Pluto | Read Here |
| Orokin Cell | Void | |
Kuva | Kuva Fortress, Kuva Siphons and Kuva Floods |
Infested Salvage Mission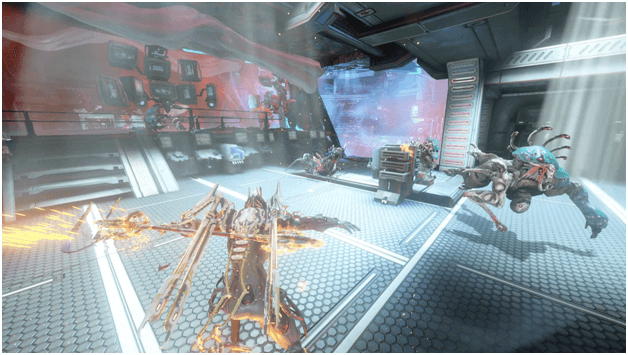

The Infested Salvage mission Oestrus can be found on Eris and may be done once all nodes linked to it have been unlocked or if you have someone bring you along with them, provided they have unlocked it. You will need to collect Antiserum Charges that you will use to power Vaporizer units. These will keep an area safe and increase the speed of Lotus accessing the manifests, which are the main purpose of the mission.
You will simply need to fight off enemies, collect the Antiserum Charges (you can hold a maximum of 3) and use them when the Vaporizer units are low. If you fail to keep the Vaporizers powered, progress will slow down and the areas that the Vaporizers do not protect will corrode your Warframe’s armor, making you weaker against enemy attacks. In order to restore your Warframe’s armor, there will be terminals you can access which will cost an Antiserum Charge.
You will need to do this mission multiple times before you will obtain all of the parts for Nidus since his parts only drop on rotation C which is basically four rounds. Players prefer two do one or two sets before extracting and repeating the mission for an easier experience.
Once you get all of Nidus’ parts, you can then craft him, provided you finish the Glast Gambit quest and have all the resources needed.
How to Get Nidus Prime?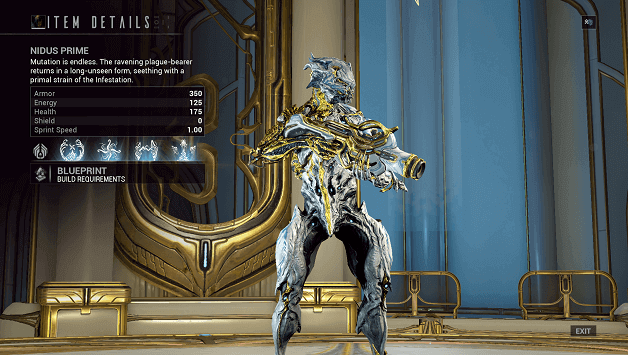
Nidus Prime can be obtained by unlocking its parts from the following Void Relics:
Nidus Prime Blueprint
- Axi A14
Nidus Prime Neuroptics
- Neo N16
Nidus Prime Chassis
- Lith N7
Nidus Prime Systems
- Meso B5
Tips
- The more enemies you kill, the more Antiserum Charges that will drop, allowing you to keep more Vaporizers activated, so bring Warframes with abilities to kill multiple enemies or equip weapons that are good against a crowd.
- Joining a public game is a good wait to get through the mission as this may be more challenging when being done solo.
- Filling up the Vaporizers in a rotation will allow you to save up on Antiserum Chargers as well as keep things orderly.
- The armor corrosion is not much of a threat but if necessarily, it is okay to use a charge occasionally, but not recommended when Warframe armor is not reduced that much.
Final Thoughts
Many have come to like Nidus for his unique abilities that go with the unique type of Warframe that he is, but it does take some time and hard work to get out infested Warframe.
It is advised to get his blueprint first by doing the quest, followed by farming his parts on Eris.When going for Nidus, soloing is not bad, but you will have to be coordinated to avoid running around the place.
Its much easier to pick up Antiserum Charges as you kill enemies in a rotation while also depositing them into the Vaporizers.
A common mistake is placing all the Antiserum Charges in one Vaporizer, which must be avoided. Stick to killing enemies in a rotation, placing one Antiserum Charge per Vaporizer and you will find yourself at ease.
If you have a build that can survive both the quest and the Infested Salvage, things should not be too hard. If things do get a bit rough, your best bet would be to join a squad or bring a buddy to help you out.
Contents