Warframe has introduced a lot of new features in the past, one of them being the ability to use the Operator which surprised many players when The Second Dream came out.
Instead of only being able to use your Warframes, you may now control the Operator, who was piloting them using Transference, using a device called the Somatic Link.
Operators have their unique abilities and giving players more to choose from, different schools affect them.
What Are Focus Schools?
Focus Schools are specific classes for your Operator which allow you to choose which one suits you best when you play Warframe.
Focus Schools in Warframe are unlocked as you progress through the quest and complete The Second Dream quest, unlocking the Operator in the process.
Each of the Focus Schools has its unique traits and background lore which defines why they have certain abilities.
Different Focus Schools
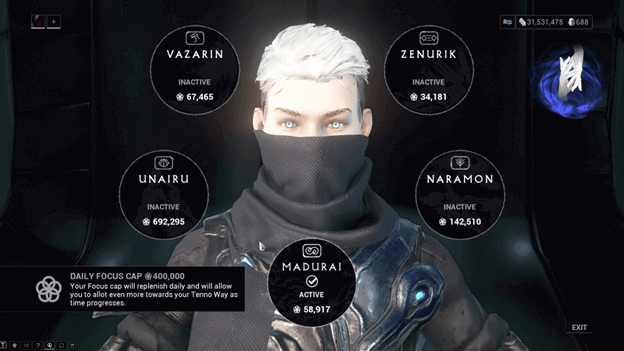
There are 5 different Focus Schools that you can choose from, with each of them having its unique abilities.
Although you may only have one active Focus School at a time, the ability to set some of them to be Way-Bound will allow them to share specific ones.
The following are the different Focus Schools in Warframe:
1) Madurai
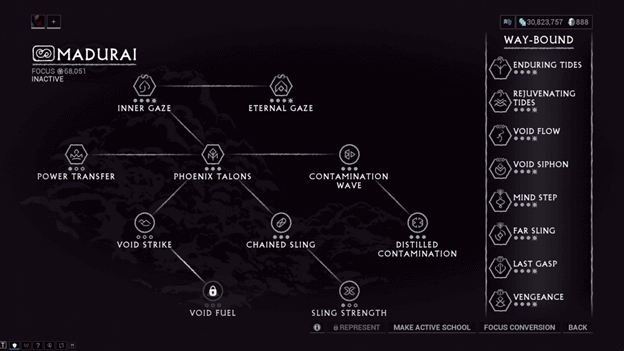
As a school dedicated to offense, those who follow the Madurai ways are unrelenting fights who excel in the arts of ambush and barrage.
Those who are focused on the ways of Madurai are granted predatory and savage power, allowing them to overpower their enemies with sheer damage.
The Madurai ways include the following:
- Phoenix Talons – Physical damage and Operator damage increased by 5/10/20/30%
- Power Transfer – Switching to Operator provides 45/60/75/100% Amp Critical Damage for 5/10/15/20 seconds or 20/30/40/50% casting speed when switching to Warframe.
- Chained Sling – Consecutive Void Slings will have 20/30/40/50% Energy Efficiency.
- Sling Strength – Switching to Warframe after a Chained Sling will add 10/20/30/40% Ability Strength for 5/10/15/20 seconds.
- Contamination Wave – Second ability emits a Void wave that lasts 0.5/1/1.5/2 seconds which drenches enemies with Void Contamination, making them 20/30/40/50% more vulnerable to operator damage for 5/10/15/20 seconds.
- Distilled Contamination – Killing enemies that are affected by Contamination Wave makes all affected enemies 10/15/20/25% more vulnerable as well as increases the effect to last 4/6/8/10 seconds longer with a maximum of 2 stacks.
- Inner Gaze – Increases Energy for Amps and Void Beam by 10/20/30/40%
- Eternal Gaze – Increases Energy Regeneration Rate for Amps and Void Beam by 15/30/45/60%
- Void Strike – First ability consumes all energy to increase damage by 4/6/8/10% for every percentage consumed for 5/6/7/8 seconds. (Cooldown: 70/60/50/40 seconds)
- Void Fuel – Weapon Efficiency for Warframe and Operator is increased by 10/20/30/40% when Void Strike is active.
2) Naramon
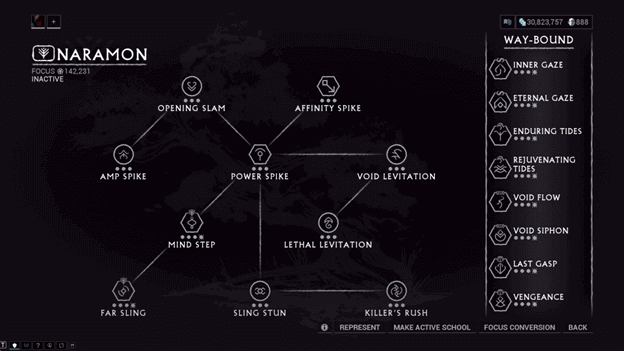
The Naramon focus on knowing their enemy and are known to be Tacticians who believe that to truly understand a foe would be to confer the greatest advantage upon a warrior.
Focusing on the art of assault, they excel in direct combat to dominate and neutralized their foes on the battlefield.
The Naramon ways include the following:
- Power Spike – Melee Combo Counter decays by 20/15/10/5 seconds instead of completely depleting.
- Affinity Spike – Affinity gained from melee weapons is increased by 15/25/35/45%
- Mind Step – Operator Movement Speed is increased by 7/15/22/30%
- Far Sling – Void Sling distance is increased by 7/15/22/30%
- Sling Stun – First Operator ability creates a 3/4/5/6 meter wide shockwave which lasts 1/2/3/4 seconds, applying the Lift Status on enemies hit.
- Killer’s Rush – Initiating a finisher as the Operator will switch you back to your Warframe and increase Critical Chance by 20/30/40/50% for 10/20/30/40 seconds.
- Opening Slam – Performing a Slam as an Operator will switch you to your Warframe and provide it with double Combo gain for 5/10/15/20 seconds.
- Amp Spike – Transferring to Operator with 8x Combo Multiplier will increase AMP damage by 40/60/80/100% for 10/20/30/40 seconds.
3) Unairu
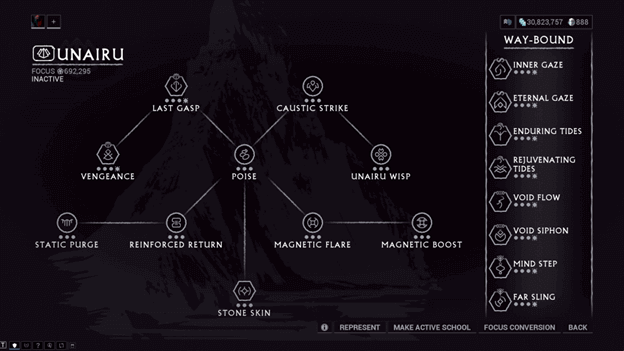
Those under Unairu have pushed themselves to the limits, outlasting enemies to withstand all aggression shun towards them.
They believe that if an enemy cannot match their endurance, a battle may already be won without having even commenced.
The Unairu ways include the following:
- Poise – Gain immunity to slow, stagger, and knockdown effects for 10/20/30/40 seconds after transferring between Operator and Warframe.
- Caustic Strike – Second ability launched an energy bomb that explodes with a 5/6/7/8 meter radius, reducing enemy armor by 40/60/80/100%
- Unairu Wisp – Gain a 25/50/75/100% chance to summon an Unairu wisp when hitting an enemy with Caustic Strike, providing the nearest ally Operator with 20/40/60/100% damage for 5/10/15/20 seconds.
- Last Gasp – Revive your Warframe by transferring to your Operator and killing 3 enemies before 9/11/13/15 seconds.
- Vengeance – Operator damage is increased by 25/50/75/100% with an additional 10/15/20/25% per second during Last Gasp.
- Magnetic Flare – First ability creates a 5/6/7/8 meter radius field that lasts for 12/18/24/30 seconds, disabling the shields of enemies that enter it.
- Magnetic Boost – Using Void Sling out of Magnetic Flare lets you refresh its duration and increase the radius by 25/50/75/100%
- Stone Skin – Warframe and Operator armor is increased by 50/100/150/200.
- Reinforce Return – Warframe becomes invulnerable for 1/2/3/4 seconds after Operator is downed.
- Static Purge – There is a 25/50/75/100% chance to clear Transference Static on kill when Reinforced Return is active.
4) Vazarin
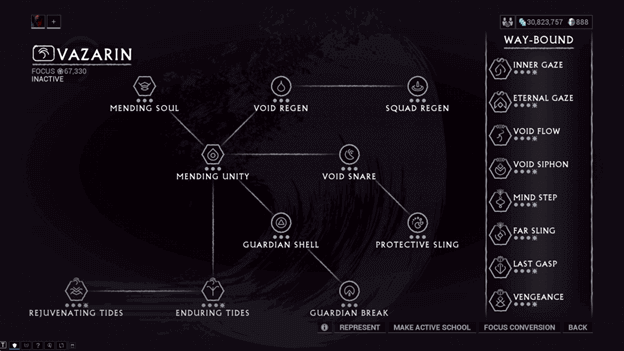
Trained in the ways of countering their enemies, those who go by the way of Vazarin move with their opponent’s attacks to nullify them.
Constant awareness is vital for those under Vazarin to defend against all aggression brought by their enemies.
The Vazarin ways include the following:
- Mending Unity – Increases Affinity radius by 10/15/20/25 meters.
- Mending Soul – Your first 1/2/3/4 revives are instant while additional ones are 25/50/75/100% faster.
- Enduring Tides – Operator armor is increased by 50/100/150/200%
- Rejuvenating Tides – Operator health regeneration is increased by 1.5/3/4.5/6 seconds and doubled when using your Warframe.
- Guardian Shell – First Operator ability manifests a barrier that is invulnerable for 4 seconds which gains bonus 200/300/400/500 additional health when damaged during invulnerability.
- Guardian Break – When Guardian Shell breaks, Warframe Shield Regeneration is increased by 90/110/130/150% and Regeneration Delay is reduced by 30/50/70/90% for 5/6/7/8 seconds.
- Void Regen – Heals starting at 4/6/8/10 health per second and increases by 4/6/8/10 per second up to a maximum of 20/30/40/50.
- Squad Regen – Void Regen reaches its maximum; it is applied to squad members within affinity range for 30/40/50/60 seconds.
- Void Snare – Second ability launches a projectile that creates a vortex trap that lasts 5/6/7/8 seconds, granting allies 40/60/80/100 health through trapped enemies. Recast when in-flight to detonate early.
- Protective Sling – Allies touched by Void Sling are granted immunity from damage for 2/3/4/5 seconds and healed by 30/40/50/60% over 5 seconds at the cost of 10 energy.
5) Zenurik

Those who master the ways of the Zenurik school believe that the path to victory is to simply dominate their enemy.
Believing that sheer strength can erase any resistance, they seek to choke their opponents of all resources to ensure victory.
The Zenurik ways include the following:
- Energy Pulse – Energy pickups give 20/30/40/50% more energy over 11/9/7/5 seconds
- Inner Might – Allows abilities to be cast without energy at the cost of shields with a cooldown of 90/80/70/50 seconds.
- Disarming Sling – Performing a sling through enemies has a 20/30/40/50% chance to disarm them.
- No Quarter – Killing an enemy that has been disarmed will increase Operator energy regen by 2/5/7/10% for 2.5/5/7.5/10 seconds.
- Temporal Drag – Second Operator ability emits a radial burst that slows enemies affected by 50/60/70/80% for 4/6/8/10 seconds.
- Temporal Shot – Precision headshot damage increases by 40/60/80/100% on enemies affected by Temporal Drag.
- Wellspring – First Operator ability creates a well of energy for 5/5/6/8 seconds, providing 3/4/4/5 Energy per second for 20/22/25/30 seconds.
- Hardened Wellspring – Using your First Operator ability inside a Wellspring increases its size, boosts its duration, and grants 12/15/18/20% Ability Strength to those inside.
Way-Bound
Way-Bound allows you to unlock a specific Focus School’s way to be activated with other schools, providing you with a bonus based on the way that has been unlocked.
These require Focus Points and a Radiant Eidolon Shard to be unlocked but are worth the trouble of getting.
It is possible to unlock 2 specific ways from each Focus School to be shared amongst the other ones, making your Operator more powerful in many ways.
The following ways may be Way-Bound to share amongst other Focus Schools:
- Inner Gaze (Madurai)
- Eternal Gaze (Madurai)
- Enduring Tides (Vazarin)
- Rejuvenating Tides (Vazarin)
- Mind Step (Naramon)
- Far Sling (Naramon)
- Last Gasp (Unairu)
- Vengeance (Unairu)
- Void Flow (Zenurik)
- Void Siphon (Zenurik)
How To Farm Focus?
There are currently two ways for you to obtain Focus in Warframe, which are by equipping Focus Lenses or by Focus Conversion.
Equipping a Focus Lens will allow you to gain Focus by a certain percentage when there is extra affinity gained (equipment is maxed out), adding points to a specific Focus School.
The type of Focus Lens determines which Focus School will gain focus as well as by what percentage it will be gained from the extra affinity.
You can equip Focus Lenses in multiple weapons and your Warframe to gain Focus Points whenever they are used to gain affinity.
There is a daily cap to gaining Focus Points which is 250,000 which scales by 5,000 based on your current Mastery Level.
Focus Conversion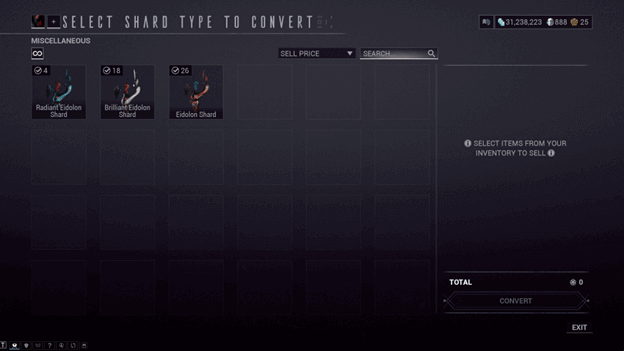

You can gain additional focus by converting Eidolon Shards, providing you with Focus Points that you can use to upgrade your Operator’s Focus Schools.
Focus gained will be added to the specific school that you have selected, which will have the Focus Conversion option when you open it.
There is no limit to how much Focus you can convert from Eidolon shards, which means you can convert as many as you like.
The following are the Eidolon Shards you can use for Focus Conversion as well as the number of points they provide.
Represent Focus School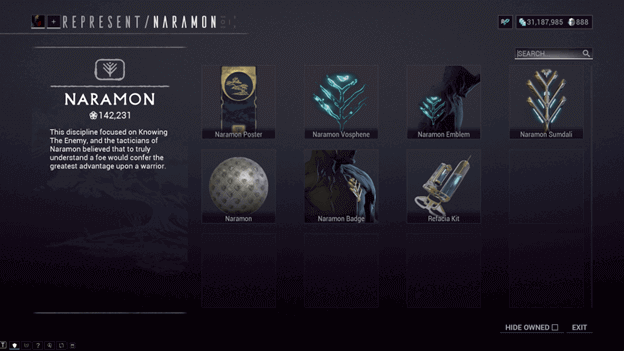
Within the Focus Schools, you will see a Represent section that will allow you to trade Focus for certain items related to the school.
Most of these objects are available to be placed within your Orbiter or Dojo and even change the appearance of certain cosmetics.
The available items in the Focus School represent section include the following and cost 1,000,000 Focus each:
- Poster
- Vosphene
- Emblem
- Sumdali
- Voidshell Skin
- Badge
Aside from all the items that cost 1,000,000, there is also a Refacia Kit (new skins for Refacia), which costs 500,000 Focus.
Verdict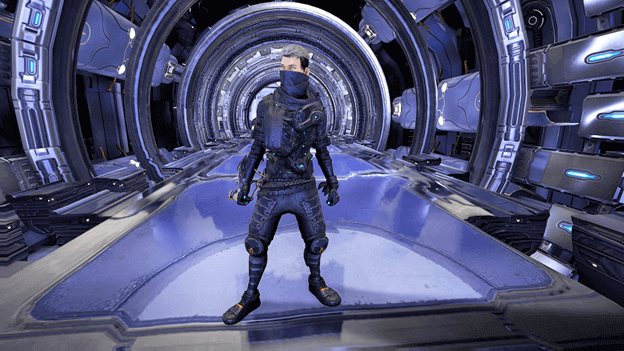
The different Focus Schools allow you to further make your playstyle more comfortable while providing you with a lot of bonuses.
Using your Operator can become essential in certain missions and will provide a better chance of success at certain times.
With the ability to unlock several ways, Operator capabilities can improve greatly, making them even better to use.
Contents